
Other important terms contd.
- Common Language Runtime:
It is a platform on which the .Net programs are executed. - Class Library:
Collection of Classes which includes methods, properties, and functions
C# Projects include different types of Applications:
- Windows Forms – Developing Forms-based applications
- Console Application: A simple command like application
- Class Library: Creating dll files
- Silverlight Application-Creating rich internet application
- WCF Service-Windows Communication Foundation (WCF) is a framework for building service-oriented applications. Using WCF, you can send data as asynchronous messages from one service endpoint to another.A service endpoint can be part of a continuously available service hosted by IIS, or it can be a service hosted in an application.
- ASP.Net – This is used for developing web-based applications. We can create by using Asp.NET, Asp.NET MVC, Asp.NET Web API and Angular 2 or above
- ADO.Net – To interact with Databases
- LINQ- To interact with Databases
3.NameSpace:
The container of different classes merged as one assembly. Once we declare the assembly we can import its abstract features.
using System;
using System.ComponentModel;
using System.Configuration;
using System.Threading;
using System.Web.Mvc;
** Download and Install Visual Studio for C#:
Visual Studio can be downloaded from the following link https://www.visualstudio.com/downloads/
After the installation, we will try to open a console project in Visual Studio
Steps to start with a console application Visual Studio.
Step1:Open Visual Studio
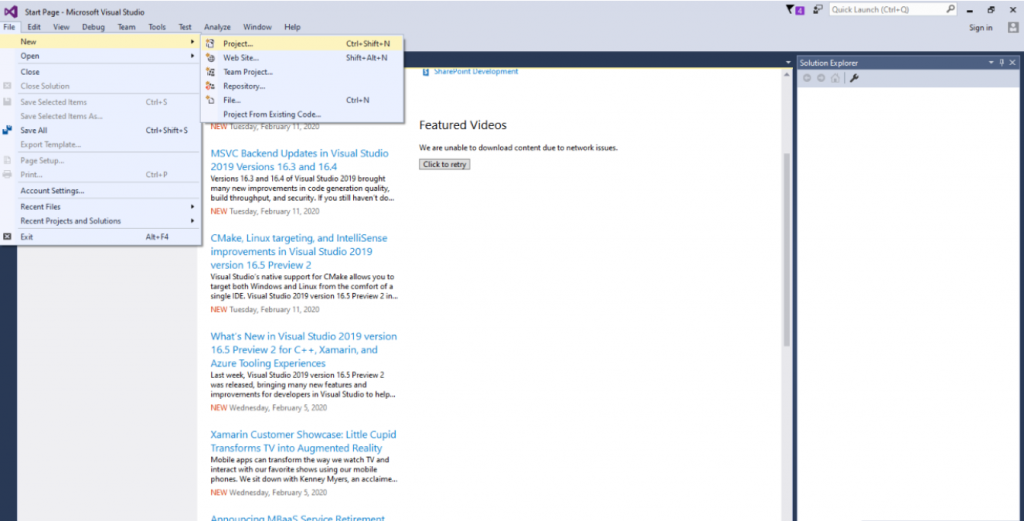
Step 2:Create a new project.
Go to File menu > Select New >Project and then a pop up will appear.

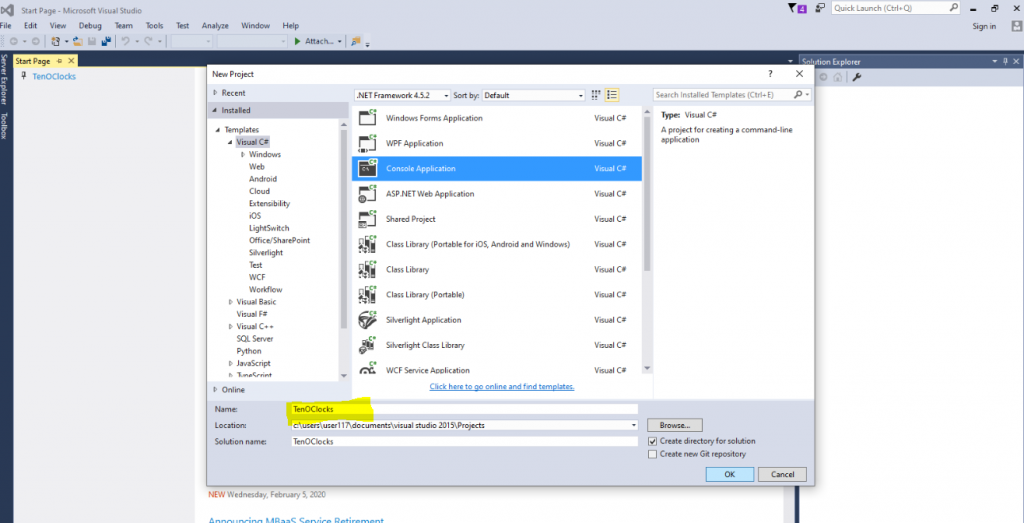
Step 3:Create a new console project
A popup screen appears as below and then> Select C# >Choose Console Application from the list item present on the pop up >and then a give a project name for the application.
You can give any name for your project. The name entered should be at the highlighted section (Yellow color)
Step 4:This will bring you to below like screen. This is the place where we will do all the programming stuff.

Building our first Program in C#:
Here, we will try to print a welcome text using a variable.
Code:
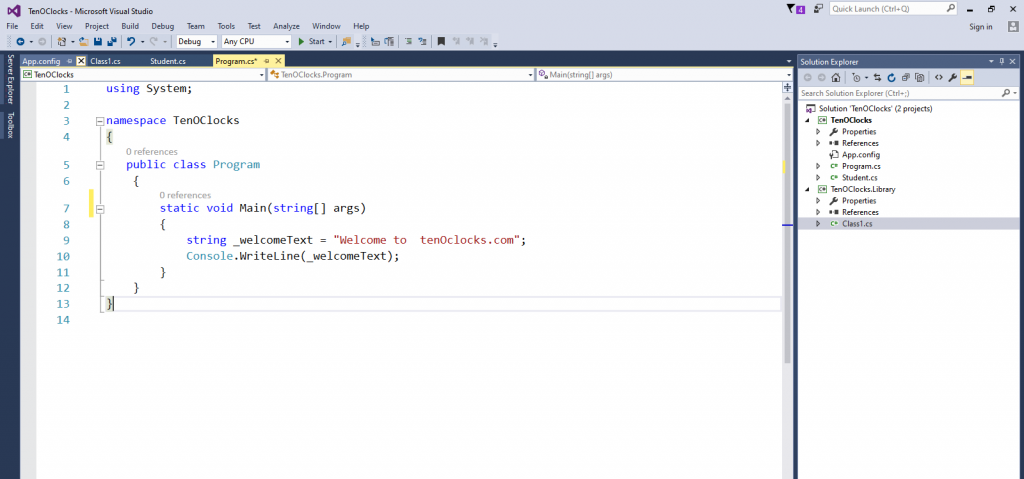
using System;
namespace TenOClocks
{
public class Program
{
static void Main(string[] args)
{
string _welcomeText = “Welcome to tenOclocks.com”;
Console.WriteLine(_welcomeText);
}
}
}
Explanation:
Here ,
using System – Its a name space (You have to include the namespace just like in c or C++ you include like #include<math.h>.
The System namespace contains fundamental classes and base classes that define commonly-used value and reference data types, events and event handlers, interfaces, attributes, and processing exceptions. (ref https://docs.microsoft.com/en-us/dotnet/api/system?view=netframework-4.8 )
To take the characteristics and features of that assembly/namespace we need to add the keyword “using“.
Public – fits access modifier (Gives protection to the class ), but since its public, therefore protection has gone public, means anyone can use the class
A more detailed discussion will be released in the later articles
Class -Just get an idea that we put all our stuff inside a class so that we can take its feature later.
static : Its means You do not need to instantiate its class to take the result
void : the return type is void
Program: You can give any name to it.
Main: Here, we access a string array called “args.” This array is populated with command-line arguments from the operating system. (you can know it later once we get into it)
string : data type (we have different data type like int , var , dynamic etc
_welcomeText :its a variable
“Welcome to tenOclocks.com” : Its a string value
Console.WriteLine(_welcomeText): This is used to print the text
Console.ReadKey();: It holds the output screen, Once you try without including this statement. You will know it better.
So it quite easy to grab that
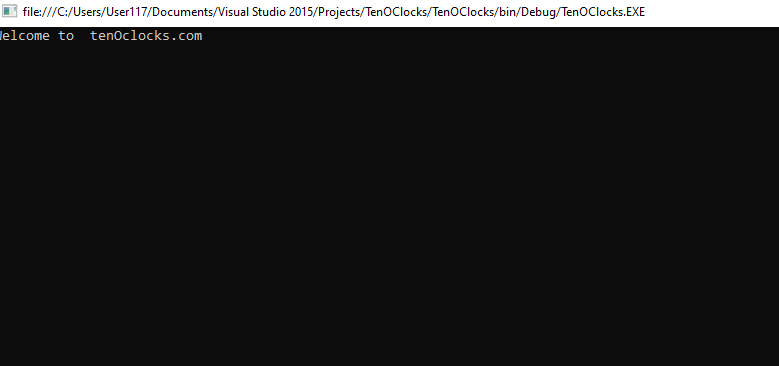
here, we want to display the message “Welcome to tenOclocks.com” on-screen, so we are storing the value in one variable which is of string type and then printing the value on the screen by using Console.WriteLine();
You also have Console.Write() to print anything;
Difference between WriteLine() and Write()
Like,
static void Main(string[] args)
{
string _welcomeText = “Welcome to tenOclocks.com”;
Console.WriteLine(_welcomeText);
Console.WriteLine(_welcomeText);
}
WriteLine() : print the statements in different line.
Output:
Welcome to tenOclocks.com
Welcome to tenOclocks.com
static void Main(string[] args)
{
string _welcomeText = “Welcome to tenOclocks.com”;
Console.Write(_welcomeText);
Console.Write(_welcomeText);
}
Write(): Prints in the same line
Output
Welcome to tenOclocks.comWelcome to tenOclocks.com
C#- Programming Guide | Beginner Phase Learning(2)
1 Comment